推荐下载:Photoshop Lightroom绿色破解版|Adobe Photoshop Lightroom v5.7
导入lr预设的详细操作方法:
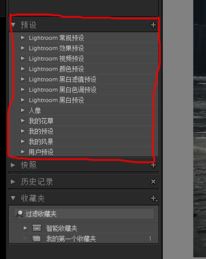
1、打开LR软件,然后在右上方找到修改照片,在左侧找到预设选项,见下图所示:
2、接下来按下面步骤依次操作:预设下方随便找一个地方点击右键,点击“新建文件夹”,跳出对话框,在对话框里面输入你所想的文件夹名字。按下后确定后,你就能在预设里面看到该文件夹;
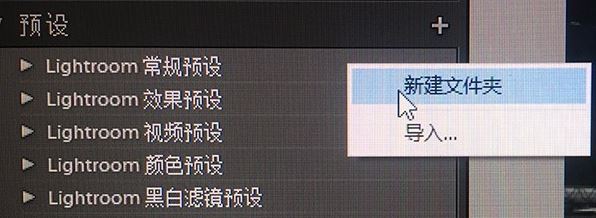
3、在新建好的文件夹上单击右键,看到并选中【导入】;

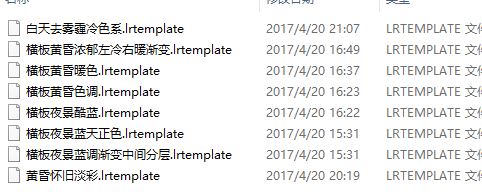
4、此时会弹出对话框,在对话框中找到你的预设文件,选中后点击确认即可!
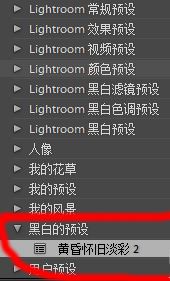
5、完成导入后我们即可看到预设!
以上便是winwin7小编给大家分享介绍的导入lr预设的详细操作方法,有需要的用户快去试试吧~
相关文章:
怎么把vcf导入iphone?vcf导入iphone图文教程
ps字体怎么导入?教你ps怎么导入字体图文操作步骤