
推荐:PhotoShop CS5绿色精简破解版 仅68M!
PS使用色彩范围来抠图使用范围
背景是纯色、或者不是纯色有渐变、或者有一些细微颜色差别的图像都可以。
PS使用色彩范围来抠图的方法
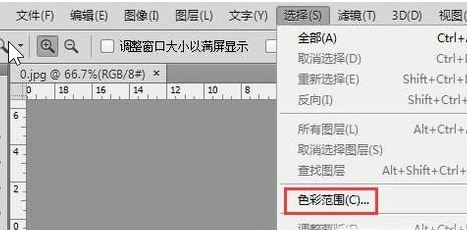
1、在PS cs5中导入需要抠图的图片,点击【选项】-在其子级菜单哪里我们就能够找到色彩范围这个选项;
2、点击色彩范围选项,在色彩范围框中我们使用吸管工具吸取背景色,然后设置颜色容差如图所示:
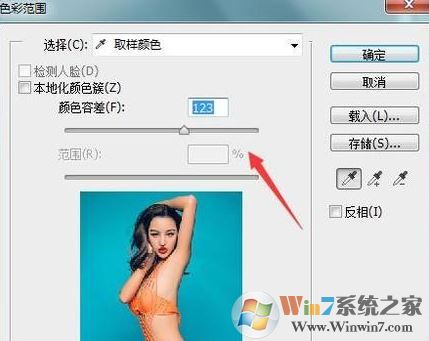
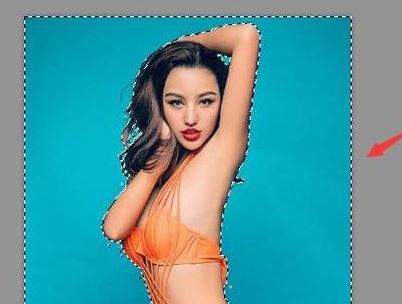
3、设置好之后,此时我们可以看到人物上就得到了选区;
还有一个操作方法如下:
1、打开图片,Ctrl+J 将背景复制一层,得到图层1;
2、打开色彩范围对话框,勾选【反相】;
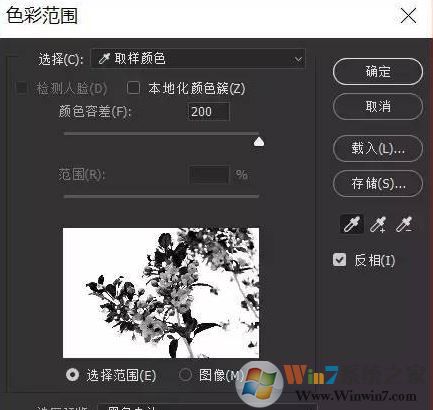
3、单击选区加色吸管(中),然后移动鼠标到图像窗口背景任意位置单击鼠标,背景部位颜色将作为被选择颜色。
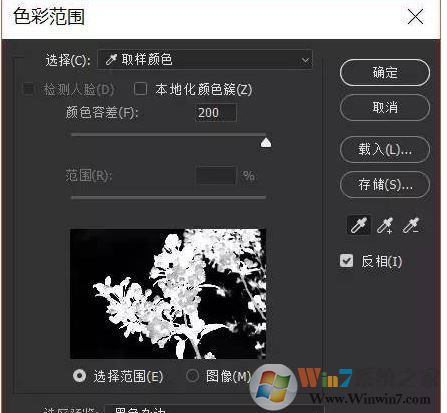
4、在色彩范围对话框中,拖动颜色容差下面的滑块,调节选择范围,直到色彩范围预览框中背景位置的颜色显示为白色为止。
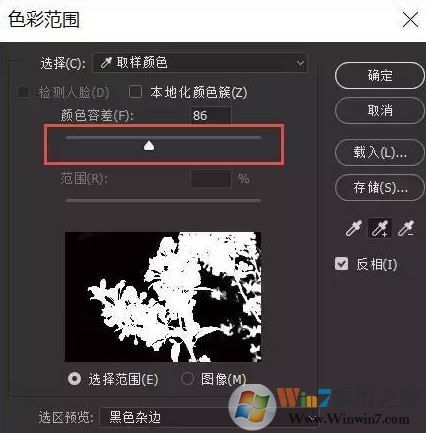
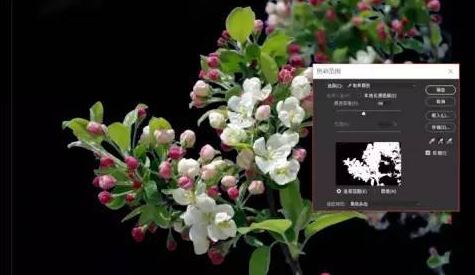
5、最后,单击色彩范围对话框右上角的确定按钮,即可得到如下的选区。
以上便是winwin7给大家分享介绍的ps色彩范围怎么用?教你PS使用色彩范围来抠图的操作方法!
相关文章
ps怎么返回上一步?PS返回上一步快捷键
| ps魔棒工具在哪?教你Ps魔棒工具的使用方法(含快捷键) |